16 Fun Hands-On Letter Formation Activities
Affiliate and Referral links are used below to promote products I love and recommend. I receive a commission on any purchases made through these links. Please see my disclosure policy for more details. As an Amazon Associate, I earn from qualifying purchases.
Help kids learn to recognize and write letters by giving them creative hands-on letter formation activities. Here are 11 fun, hands-on ideas!
Letter Formation Activities Table of contents
Why is letter formation important?
Teaching correct letter formations from the beginning can have many positive benefits for children including improving visual-memory skills and letter recognition, motor planning for how to form the letters, decreasing letter reversals, and improving handwriting speed and legibility.
Research has also shown that children who learn how to form letters correctly, activate neural pathways that promote strong reading skills (James & Berninger, 2019).
When children learn proper letter formations and it becomes automatic, this also frees their brains to be able to focus on the content of their writing, instead of having to focus on the formations of letters. This can improve overall writing and helps them to focus on phonics, spelling, grammar, and putting their thoughts to paper.
How do you teach letter formation?
You might think that just setting up handwriting worksheets is the best option for teaching letter formations, but it isn't! Focusing on hands-on activities and fine motor skills to teach letter formation is the best way to improve motor planning and visual-motor skills for letter formations.
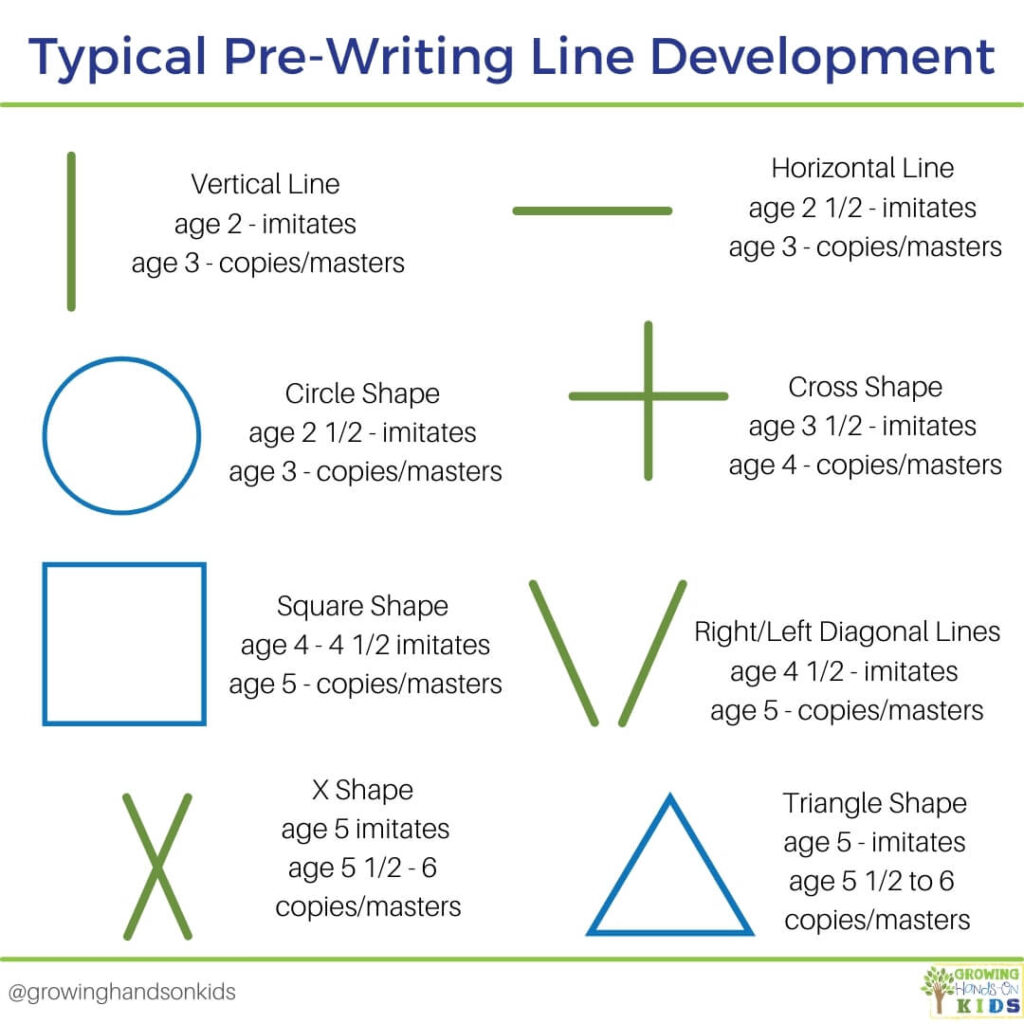
Letter formation begins with knowing pre-writing strokes and lines. Pre-writing skills are the horizontal, vertical, circle, and diagonal lines needed to form letters. Children developmentally learn these lines beginning at around 2 years old through age 6.
You can read more about pre-writing lines and strokes here.
Once your child or student has mastered pre-writing lines and strokes, you can move on to introducing uppercase letters. Developmentally, uppercase letters are easier for a child to master first. However, some like to introduce uppercase and lowercase letters together since the child will see both in the text for reading.
Instead of teaching letters A-Z in order, it's also best to teach letters in groups that have similar lines and strokes. Vertical lines and horizontal lines are developmentally mastered first, followed by circle shapes, and lastly diagonal lines.
Zaner-Bloser recommends the following groupings or letter-formation families:
Uppercase manuscript letter groups:
- Vertical/Horizontal strokes: L, I, T
- Forward circle and backward circle strokes: O, A, D, C, E, F, G, J, Q, U, S, B, P, R, N, M, H
- Diagonal strokes: V, Y, W, X, K, Z
Lowercase manuscript letter groups:
- Vertical and horizontal strokes: l, i, t
- Forward circle and backward circle strokes: o, a, d, c, e, f, g, j, q, u, s, b, p, r, n, m, h
- Diagonal strokes: v, y, w, x, k, z
The NHS in the United Kingdom recommends the following groupings and also notes that many schools in the UK teach lowercase letters first.
- Long letters: l, t, i, u, j, y
- Curly letters: c, a, g, q, o, e, f, s
- ‘Bouncing ball’ letters: r, n, m, p, h, b, d
- ‘Zig zag letters: v, w, x, k, z
There are many different handwriting programs available that can help you to teach letter formations. Some of them include:
- Learning Without Tears
- Size Matters
- Zaner Bloser
- First Strokes
- The Good and the Beautiful Handwriting program (we use this in our homeschool)
How do you practice letter formation?
Consistency is key when teaching letter formations.
Handwriting practice can last anywhere from 10-20 minutes a day with instruction on how to form the letters followed by practice. I like to start by focusing on fine motor and visual-motor activities. Then move to practice the uppercase or lowercase letter formations on paper.
Young children benefit from repeated exposure and practice. This can include visual prompts and cues for forming the letters, formation direction chants, or verbiage that will help children remember how the letters are formed.
My friend Angela has this really great uppercase alphabet and lowercase alphabet rhymes that are perfect for children learning how to form letters correctly.
Teaching Letter Formation Tips
First, remind your child that we write from left to right, just like reading.
All letters should start at the top and sit at the bottom of the line. A few letters will go down below the line, depending on their formation. Using action words such as “zoom across” or “zip-down” can help when describing how to form letters.
If you are looking for specific wording on letter formations, I have a post on letter formation directions with a free download.
I like starting with block letter paper to give children a visual for how to space and where to place their letters. You can move from block letter paper to wide-ruled paper, with green and red highlighted start and stop lines if needed for visual cues.
Here are some paper ideas:
- Adaptive Highlighted Handwriting Practice Paper: Visual Cues with Colored Lines and Left Margins for Kids
- Smart Start K-1 Writing Paper
- Hi-Write Beginner Paper, Level 1
- Visual Handwriting Worksheet for 1st – 3rd Grade
It's also important to have the right writing utensil available. Most children will benefit from having short, small writing utensils like golf-size pencils. You can also use broken crayons or sharpen a regular size pencil down to a smaller size.
Poor Letter Formation Tips
You may find some children struggling with letter formation and that could be for a number of reasons. If you have a child who is at the end of Kindergarten and is struggling with letter formation, asking for an Occupational Therapy evaluation would definitely be appropriate. Occupational Therapists can help determine if the letter formation struggles are being caused by a deficit in fine motor skills, visual-motor skills, sensory processing challenges, and more.
I also have a post on how to improve letter formation skills here.
16 Fun Hands-On Letter Formation Activities
Using hands-on ways to practice letter formations is a great way to engage children who may be hesitant in writing with a pencil.
For children who are 5-6 and younger, focusing on fine motor and multi-sensory approaches to letter formation will help as they learn the motor planning needed for each letter formation.
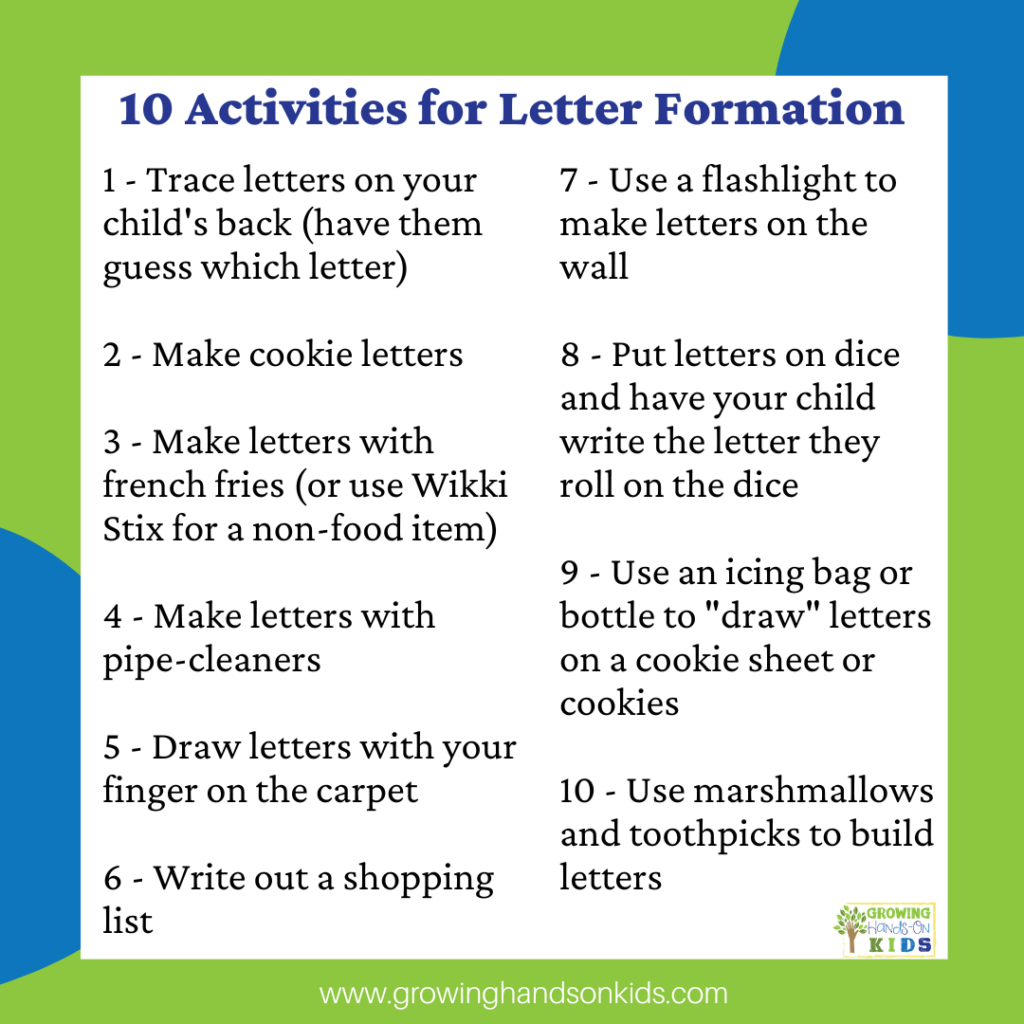
1 || Trace letters on their backs
Trace a letter on your child’s back and have them guess and write the letter on a piece of paper. Take turns and have them trace a letter on your back.
2 || Make Cookie Letters
Make cookie letters. Have your child form the letters by rolling the dough and putting the pieces together.
3 || Form letters out of french fries
If you don’t want to use food items you can use playdough or Wiki Stix.
4 || Make letters with pipe cleaners
5 || Draw letters with your finger on the carpet
Remember to use visual cues and prompts as needed.
6 || Have your children write your shopping lists
If your child is still learning to write, they may need to copy words from a paper onto the shopping list. You can also use this tip with older children, ages 6 and above who just need extra handwriting practice.
7 || Use a flashlight and make letters on the wall
You or your child has to guess the letter that was made. You can also cut out letter templates to place in front of the flashlight.
8 || Roll letters on a dice
Put letters on dice and have your child roll the dice and they have to write a word that starts with the letter.
9 || Fish for words
Place cut-out fish in a shoebox. Write words or letters on the fish. Attach paper clips to the fish and adapt a small pole with a magnet. Whichever fish the child gets, they have to come up with a word or sentence using what is on the fish.
10 || Have them write with icing tubes
You can freeze ice cubes with some food coloring in the water to make different colors. Put a toothpick or small stick in each cube so they have something to hold on to when writing.
11 || Marshmallow letters
Use small marshmallows and toothpicks to form letters.
12 || Write letters in the sand
Writing letters in the sand using a tray OR sandpaper letters is a very fun way to practice letter formations. There are lots of ideas for themed sand trays out there. I also have a round-up of ideas on my site. You can also use a salt tray if you don't have sand available.
13 || Write letters in shaving cream
This is probably one of my favorite ways to practice letter formations. It's messy and fun, which many kids will enjoy, and you can even add food coloring or glitter if you want. The shaving cream provides added tactile sensory input that can help encourage reluctant writers to give letter formations a try!
14 || Write letters with glitter glue
Squeezing the glitter glue bottle to “trace” the alphabet with the glue adds great hand strengthening. After the glue drys, it also is a great way to practice forming the letters by using a finger to trace out the letters along the glue lines.
See my glitter glue for pre-writing lines activity.
15 || Form letters with playdough
Rolling out the playdough is amazing for fine motor strengthening and the playdough makes it easy to form the lines and shapes needed for letters.
16 || Glue pom-poms to form letters
Instead of tracing a handwriting worksheet, use pom-poms and glue to form each letter.
Need More Handwriting Help?
I teamed up with 10 other pediatric therapy bloggers to write The Handwriting Book. It is your go-to guide for learning all about handwriting. It’s a digital ebook and is a great resource to have on hand in your home, classroom, or therapy sessions.

References for further reading:
- Asher, A. V. (2006) Handwriting Instruction in Elementary Schools. American Journal of Occupational Therapy, 60, 461-471.
- Dinehart, L. H. (2014) Handwriting in Early Childhood Education: Current Research and Future Implications. Journal of Early Childhood Literacy, 0 (0), 1-22.
- James, K. & Berninger, V. (2019) Brain Research Shows Why Handwriting Should Be Taught in the Computer Age. LDA Bulletin, 51 (1), 25-30.
- Richmond, J. E. (2010). School-aged children: visual perception and reversal recognition of letters and numbers separately and in context. Doctor of Philosophy, Edith Cowan University, Perth.
You May Also Like:

Heather Greutman, COTA
Heather Greutman is a Certified Occupational Therapy Assistant with experience in school-based OT services for preschool through high school. She uses her background to share child development tips, tools, and strategies for parents, educators, and therapists. She is the author of many ebooks, including The Basics of Fine Motor Skills, The Basics of Pre-Writing Skills, and co-author of Sensory Processing Explained: A Handbook for Parents and Educators.