Nativity Sensory Bin
Affiliate and Referral links are used below to promote products I love and recommend. I receive a commission on any purchases made through these links. Please see my disclosure policy for more details. As an Amazon Associate, I earn from qualifying purchases.
The Christmas season is nearly upon us. This year, I wanted our focus to be on the meaning of Christmas, Jesus. Now that my daughter is 2 years old, she can understand more of the story of baby Jesus. Plus, I wanted to give her a fun way to explore this Biblical account. Our Nativity sensory bin became a big part of introducing more of the account to her.
It took me about half an hour to make this. It's super easy to do and you just need a few items to make it.
Items for Nativity Sensory Bin
- Wooden activity tray or basket
- Brown crinkle paper (you could also use real straw if you have access to some)
- Craft sticks
- Wooden stick people or peg people
- Felt (3-4 colors of your choice)
- Farm animal figures
- Christmas angel (I used a small, metal Christmas tree angel topper)
- Wooden star or ornament star
- Hot glue gun
The first thing I did was make the craft stick manger. I heated my hot glue gun and glued 2 pieces in the shape of an “X'. You will need to make two of the “X” shapes.
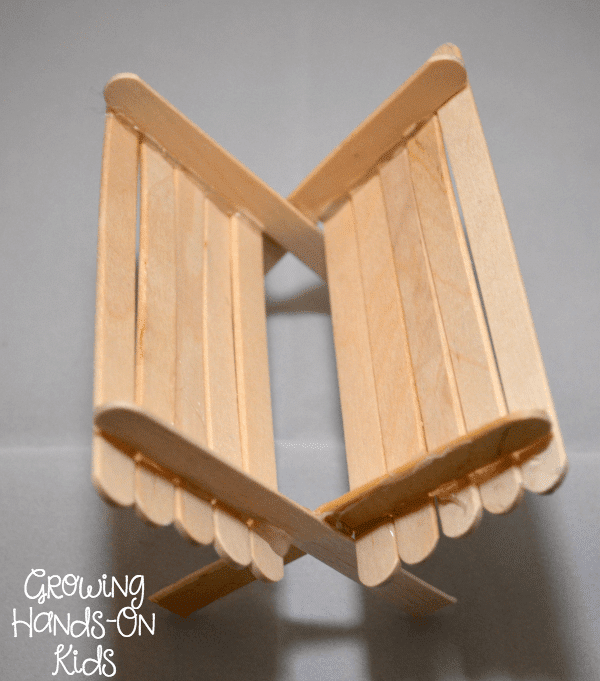
Then I put hot glue on the top, outside of the craft stick “X” and held the glue sticks horizontally in place until they stuck. Then I glued the 2nd “X” shape to the other side. It was really easy to do and the hot glue is still holding up well. I also cut off the bottom legs about halfway up so that the manger wasn't so high.
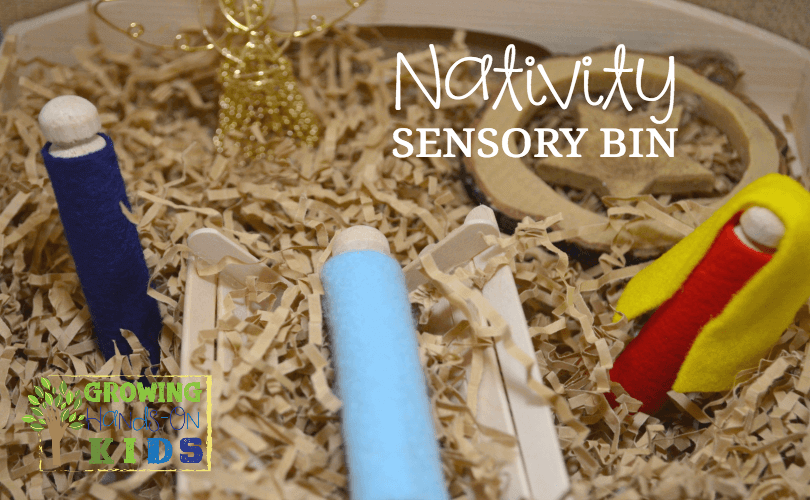
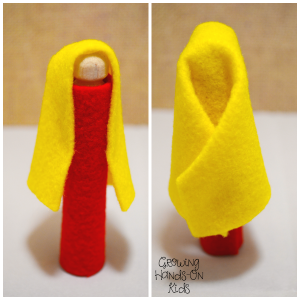
Next, I used the hot glue gun to wrap the wooden stick people with felt. For Mary, I also added the yellow headpiece so that you could tell who was who in the manger scene. I used hot glue on the top of her head and also halfway down the sides of her body to keep it in place. Then I folded the back and hot glued the pieces together so that they stuck nicely in the back.

For Joseph and Baby Jesus, I did not add the headpiece, but I did use different colors for their bodies so you could tell they were supposed to be different people.

I debated on adding faces, but when I added faces with a marker they looked creepy, haha. So I left the faces off. I plan to order some actual wooden peg people, and replace them with painted faces. The craft store I was at this past weekend did not have the exact wooden peg people I was looking for, so I settled with the stick ones above for now.
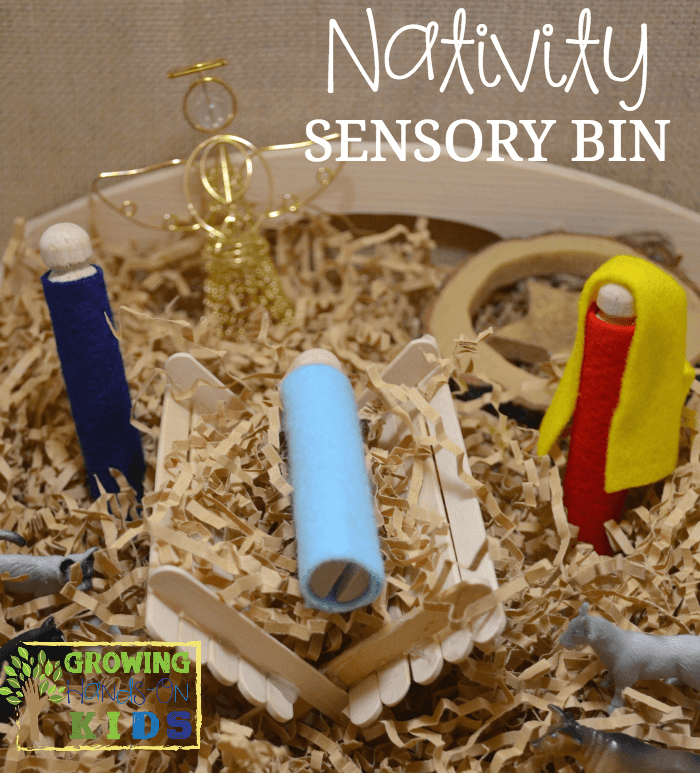
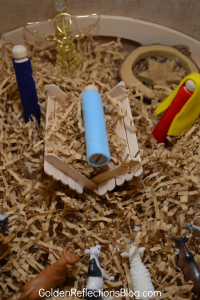
Next, I assembled the Nativity sensory bin. I placed the brown crinkle paper on the bottom to represent straw. I also placed some in the manger and put Baby Jesus on top of the manger. The animals were at the bottom of the tray, with the angel and star at the top.
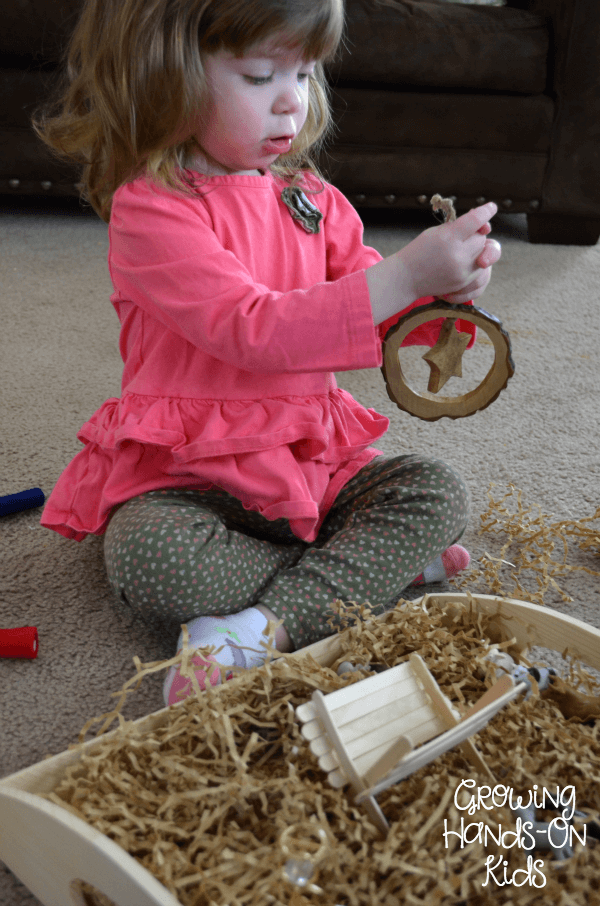
This nativity sensory bin was a huge hit with her. When I first introduced the sensory bin to her, I told her what each item represented and we talked briefly about the Advent story.
Then I just left her to explore the bin and play with the items. We sat on the floor for this specific introduction, but now we have the sensory bin on our little tot school table, so she has been going over there to play with it.
Nativity Sensory Bin
Equipment
- 1 Wooden activity tray or basket
- 1 Hot glue gun
Materials
- 1 bag Brown crinkle paper you could also use real straw or hay if you have access to some
- 1 package Craft sticks
- 3 pieces Wooden stick people or peg people
- 3-4 pieces Felt 3-4 colors of your choice
- 5-6 pieces Farm animal figures any amount of your choice
- 1 Christmas angel
- 1 Wooden star or ornament star
Instructions
- First, make the craft stick manger. Heat the hot glue gun and glue 2 craft stick pieces in the shape of an "X'. You will need to make two of the "X" shapes.
- Put hot glue on the top and outside of the craft stick "X" and held the glue sticks horizontally in place until they stuck.
- Glue the 2nd "X" shape to the other side of your manger.
- Cut off the bottom legs on the "X" about halfway up so that the manger sits lower and flat.
- Wrap each wooden stick person with felt, a different color for each one.
- For Mary, add the yellow headpiece on top of the peg person's head. Put hot glue on the top of her head and also halfway down the sides of her body to keep it in place. Fold the back of the felt around her body and hot glue the pieces together so that they are nicely in place in the back.
- Finally, assemble the Nativity sensory bin. Place the brown crinkle paper on the bottom of the wood tray to represent straw. Put some crinkle paper in the manger and put Baby Jesus on top of the manger.
- Place Mary and Joseph, the angel, and farm animals scattered around the wooden tray.

You May Also Like:

Heather Greutman, COTA
Heather Greutman is a Certified Occupational Therapy Assistant with experience in school-based OT services for preschool through high school. She uses her background to share child development tips, tools, and strategies for parents, educators, and therapists. She is the author of many ebooks, including The Basics of Fine Motor Skills, The Basics of Pre-Writing Skills, and co-author of Sensory Processing Explained: A Handbook for Parents and Educators.
Simple and beautiful! Thank you for stopping by the Learn & Play Link Up. Your post is featured on Christmas Montessori Network this week!
Oh I love this so much!! Thanks for linking with Tuesday Tutorials #pintorials
Thanks Kate!
This is such a brilliant post! Love it. 🙂