Sensory-Motor Walk Stations for Home
Affiliate and Referral links are used below to promote products I love and recommend. I receive a commission on any purchases made through these links. Please see my disclosure policy for more details. As an Amazon Associate, I earn from qualifying purchases.
With many of us doing virtual learning or homeschool these days, I wanted to provide an easy way for parents to give sensory-motor breaks at home. With children on computers and screens even more for virtual learning, movement and brain breaks are twice as important.
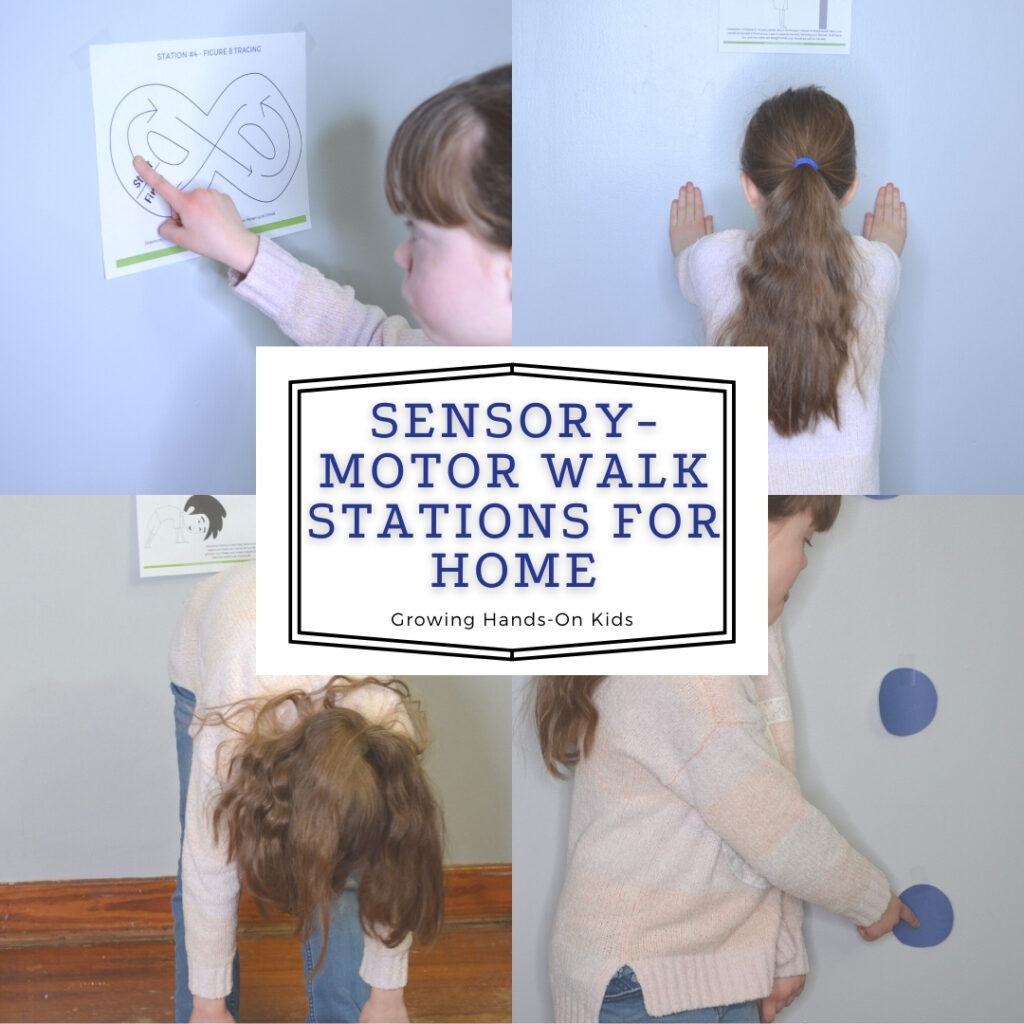
With this sensory-motor walk stations for home printable, you can set up 9 sensory break stations easily in your home with no additional equipment. Just print out of the prompts, hang them up in a hallway or around the room and you are ready to go.
If your child happens to be in a hybrid situation where they are in school part of the time and home the other times, I also have this sensory-motor walk for school. It is almost exactly the same, other than one station added if your child's school has scooter boards. If you happen to have a scooter board, you can also use the school version for home.
To get the free printable of this sensory-motor walk, scroll down to the bottom of this post and look for the email form. Or, you can also click here.
Setting Up Your Sensory-Motor Walk
For taking the pictures here at home, I just used some tape to hang the pictures to the wall. If you are short on time or supplies this would work fine.
I would suggest printing each station out on cardstock and laminating them. This will ensure that the stations last longer. I used glue-dots to fasten them to the wall when I was working at my local school.
If you are putting them in a more permanent area and are able to, you could also put them into frames and hang them on the wall.
You will also want to get some painters tape to mark areas on the floor where children are to stand for the wall push-ups (station #2) and any of the other stations where children may need an extra visual cue on where to stand to complete the activities.
Sensory-Motor Walk for Home Station Instructions
Here is a brief explanation of each sensory station so you know how to give instructions for each one to your child.
Always end with some calming activities to help bring their body and brain back to that just-right level of awareness and alertness.
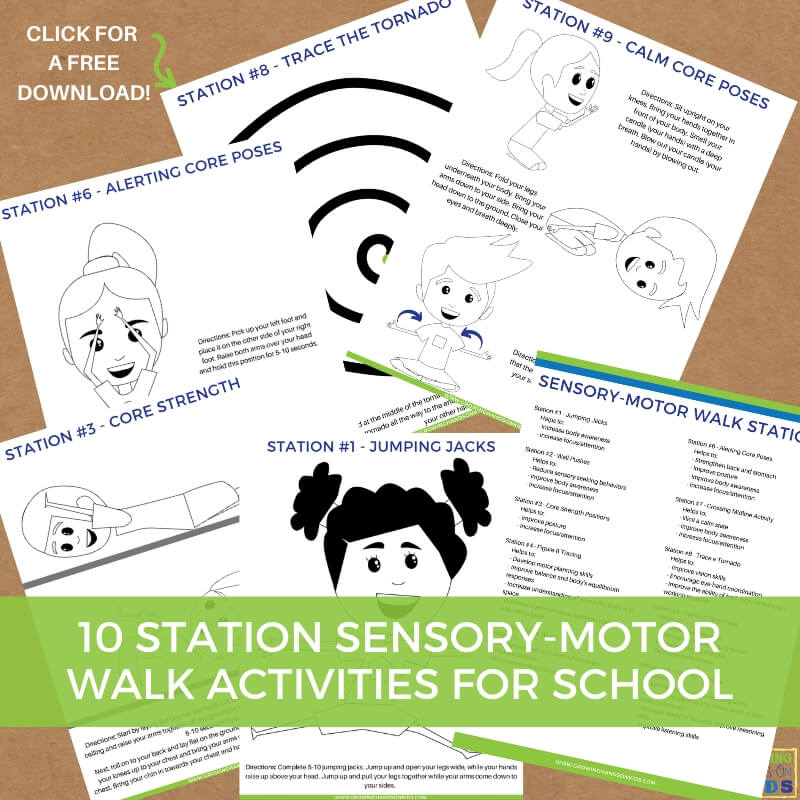
STATION #1 – JUMPING JACKS
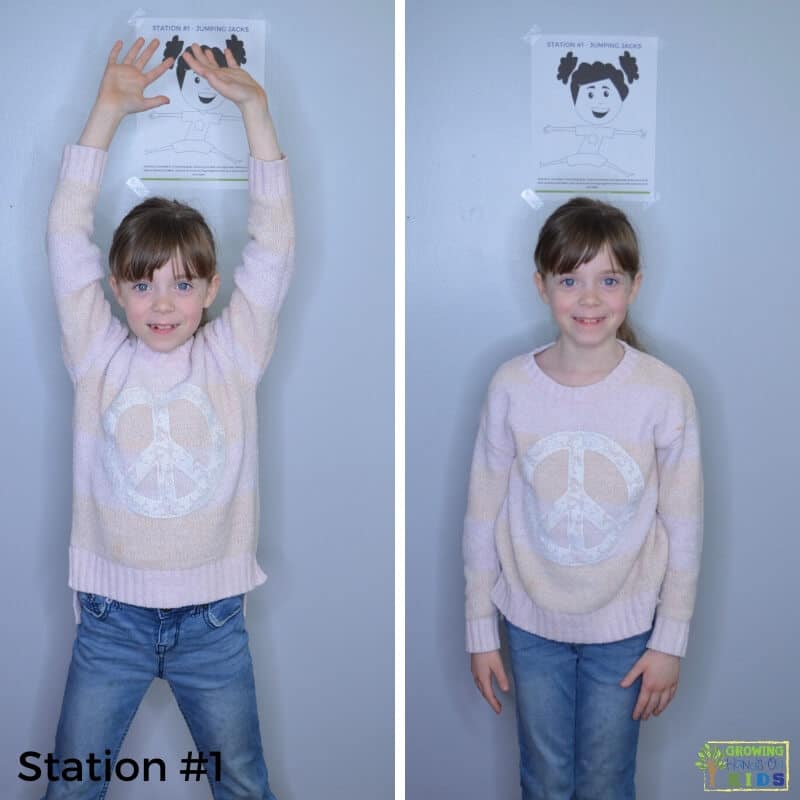
You can set a certain number amount for children to complete before going to the next station. Five is typically a good starting point depending on their skill level.
Also, provide adaptations such as just jumping with the feet and keeping the hands on the sides of the body. Or just the hands moving up and down with the feet standing still. You can gradually include both together as children progress with this skill.
Jumping jacks provide increase body awareness, focus, attention, and can elicit a calm state for children. It is an excellent way to engage the proprioception system.
STATION #2 – WALL PUSHES
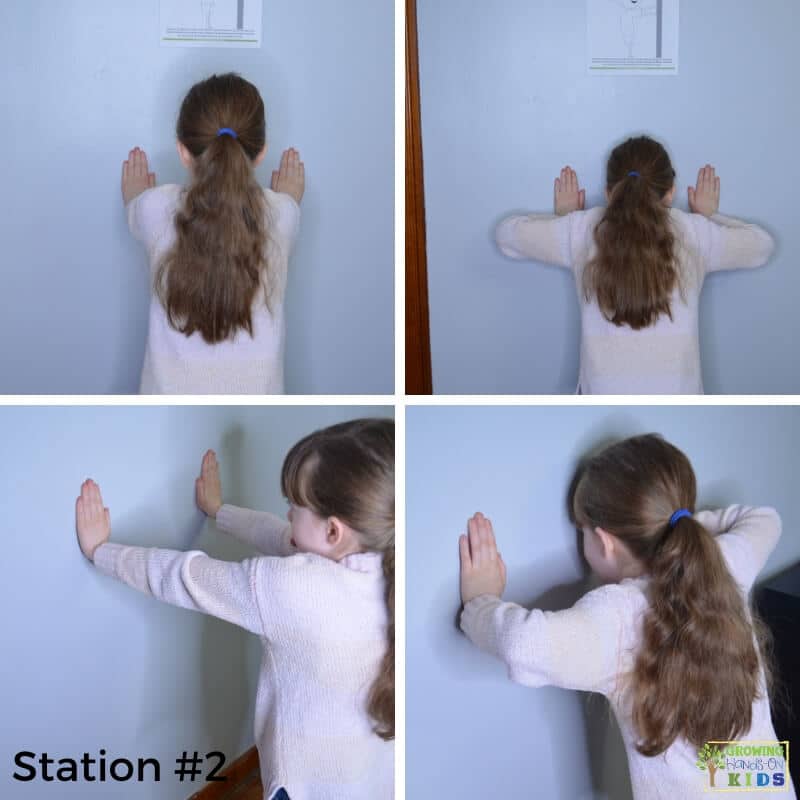
Again, you can set a certain number amount for children to complete, five is a good starting point.
For this particular station, I would also suggest using some painters tape to mark the floor for where the child should put their feet. Their feet need to be far enough away so that their hands can be flat on the wall with the elbows completely straight (or extended).
Wall pushes can help reduce sensory seeking behaviors by providing proprioceptive input that many children crave. They can also improve body awareness, focus, and attention.
STATION #3 – CORE STRENGTH

These two exercises are designed to build the core muscles needed for seated work at a desk and many other daily functions of a child.
The first exercise is in the prone position (on the stomach). Have the child lay completely flat and then lift the arms and legs up off the ground at the same time. The goal is to get to 10 seconds or more of holding this position. Many children start out below 5 seconds.
A couple of things to look for is that the child keeps their elbows and knees completely straight or extended. Many children who will struggle with this activity try to bend their elbows in or their knees up.
The next position is in supine (on the back). Have the child lay completely flat with their arms above their head. Then have them curl into a ball by bringing the knees into their chest, placing their hands on their knees, and pulling their head up towards their knees. The object is to hold this position for 5-10 seconds without falling over onto their side.
You might see a child trying to extend their neck out or start to roll onto their side as they fatigue.
Both of these positions help to improve posture, focus, and attention.
STATION #4 || FIGURE 8 TRACING
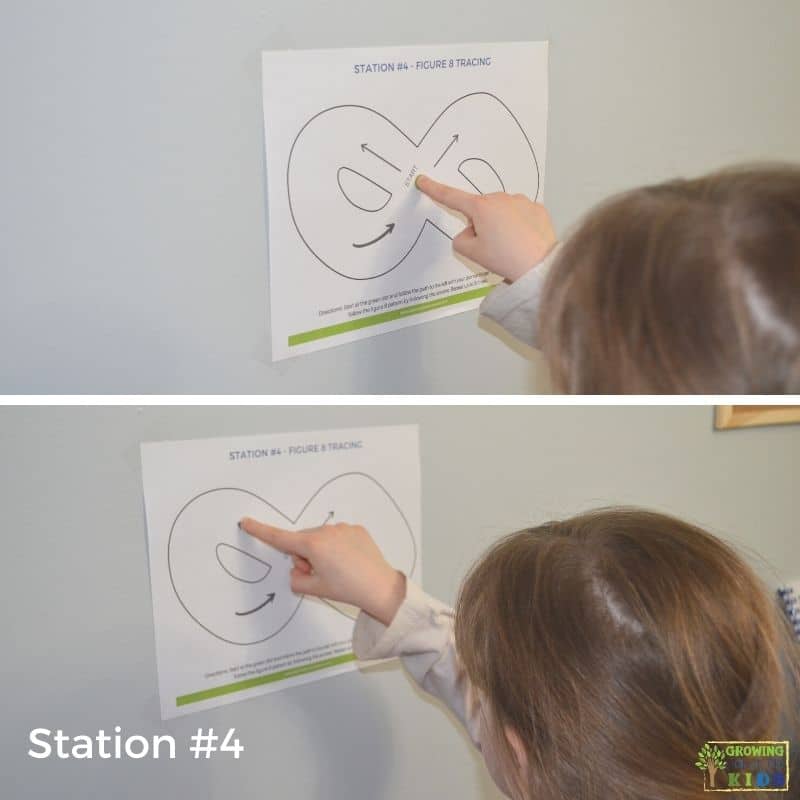
For this station, you will also need a piece of painters tape to mark the spot where the child should stand. Have them stand directly in the middle of the large figure 8 printable and air trace it with their pointer finger (dominant hand first, then opposite hand).
You will want to start by having them trace up the left side of the figure 8, moving down and then across to the right side and back to the middle.
This exercise helps to develop motor planning skills, improve balance and the body’s equilibrium response, understanding where the body is in space and improves communication between the opposite sides of the brain.
STATION #5 || ALERTING YOGA POSES
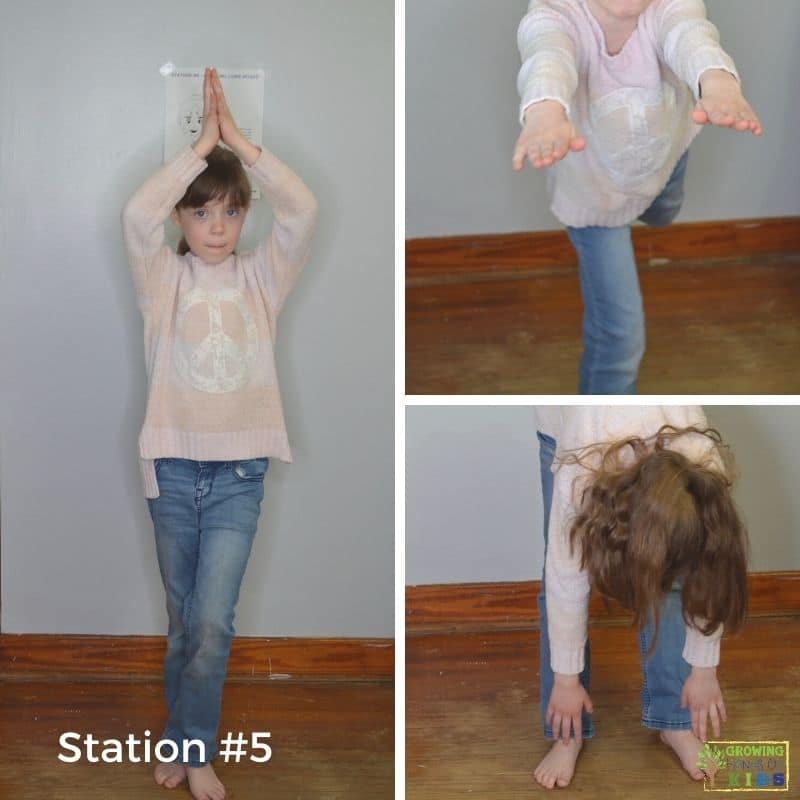
This particular station has the child complete yoga poses which typically provide an alerting response for the child. They can also strengthen the back and stomach, improve posture, body awareness, focus, and attention.
STATION #6 || CROSSING MIDLINE
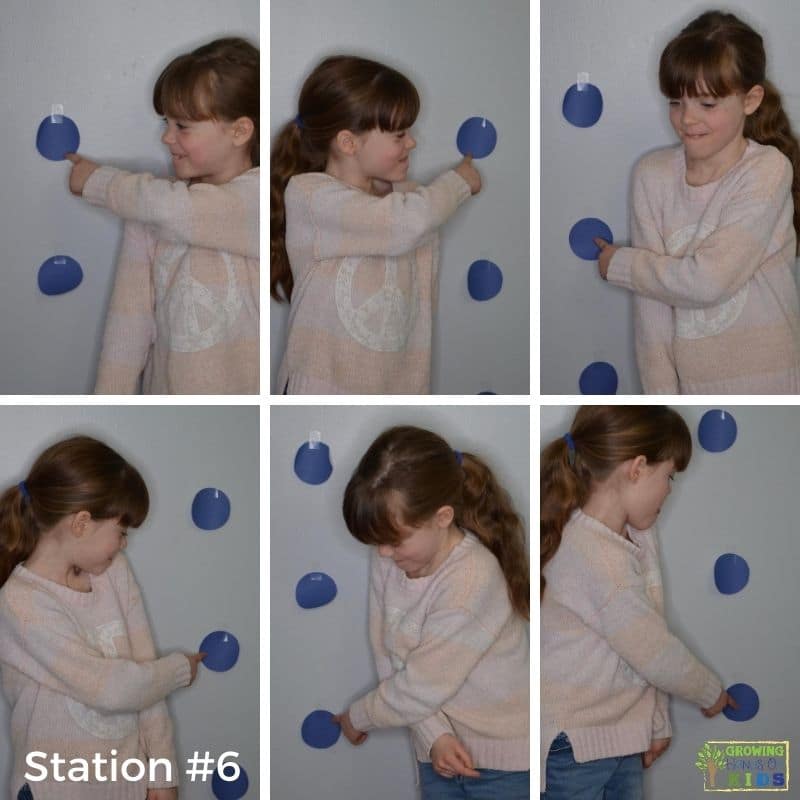
I discuss the importance of crossing midline in this post here. For this station, I included 3 different activity options.
Option 1 is using the index finger to push all the buttons by reaching across the midline to the opposite side. Alternate hands and sides to complete this activity.
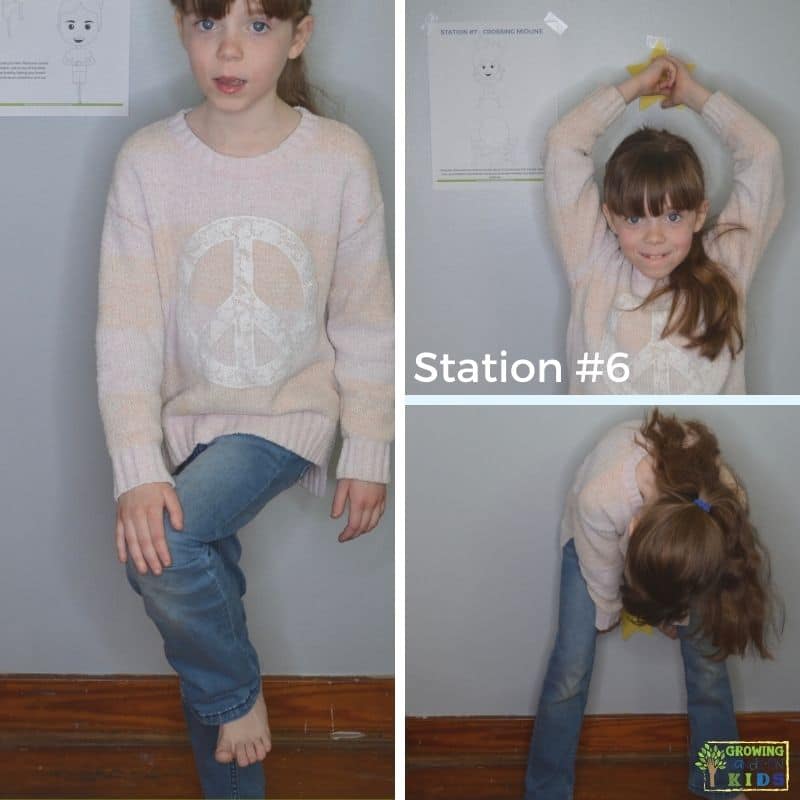
Option 2 is a cross-crawl activity. And option 3 is touching the star above their heads and below them (have them stand with feet apart so they can see the star when they bend over).
For option 3, you can have a child hold a small ball and touch the stars with the ball if they have trouble touching with both hands at the same time.
STATION #7 || TRACE THE TORNADO
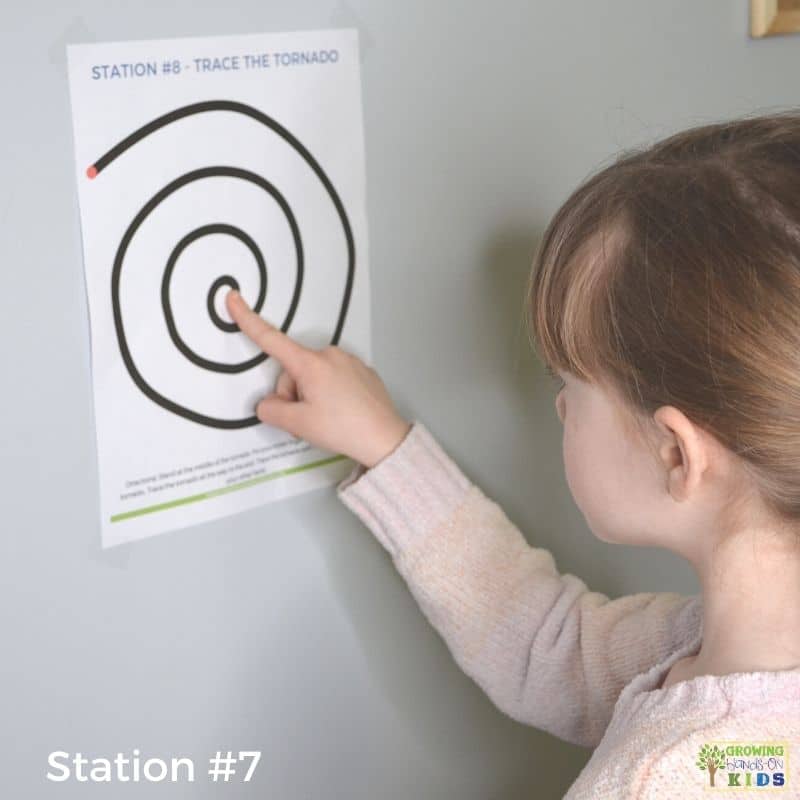
This station is very simple to execute. You may need to place a line on the floor with painters tape if your child tries to stand too close to the wall to do this. My daughter also went from the red dot to the green dot after starting at the green dot, so you could certainly have your children do this as well.
The main difficulty with this station is going slow enough to keep their finger on the line. I had to give my daughter a couple of verbal cues to slow down so she could stay on the line.
STATION #8 || CALM YOGA POSES
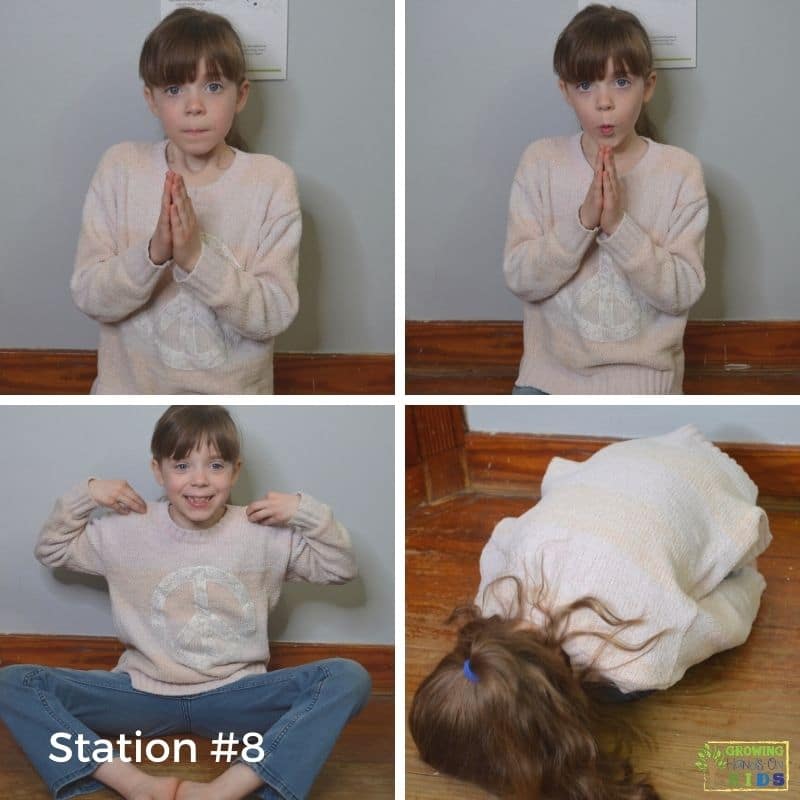
If you don't have time to complete every single station that is fine, but I would always include stations 8 and 9. If you send a child back to academic work all hyped up, it defeats the purpose of using the sensory-motor walk. ?
Children need time to decompress and regulate in order to return with more attention and focus. That is the point of the last two stations, taking time to relax and breathe before going back into seated work.
I love the analogy of smelling a flower and blowing out the candle for deep breathing. It's easy for kids to understand what this looks like.
I would suggest holding each pose for 10-20 seconds, depending on how much the child needs to relax.
STATION #9 || CALMING ACTIVITY

Cross-crawls can be calming because of the repetitive motion. It's important that they complete these motions smoothly and slowly while breathing normally.
The last activity pulls in some interoception by feeling their breathing rate by placing their hands on their stomach and breathing deeply.
Get Your FREE Sensory-Motor Walk Stations for Home Printable
To get your copy of this FREE Station Sensory-Motor Walk for Home Printable, just enter your email address into the form below.
You will be agreeing to receive my newsletter, which I send once a week, and has more child development tips, tools, and strategies. You can unsubscribe at any time.
For more information on sensory processing, check out my other posts below.

Heather Greutman, COTA
Heather Greutman is a Certified Occupational Therapy Assistant with experience in school-based OT services for preschool through high school. She uses her background to share child development tips, tools, and strategies for parents, educators, and therapists. She is the author of many ebooks, including The Basics of Fine Motor Skills, The Basics of Pre-Writing Skills, and co-author of Sensory Processing Explained: A Handbook for Parents and Educators.
Very very useful resources fantastic presentation and easy to remember.